Linking Somfy RTS motor to Vera Plus
Configuring VERA UI7 to work with RFXtrx433 transceiver
Extending VERA’s capabilities to be able to control devices based on 433MHz frequency bands makes great sense. Simply adding the RFXtrx433E USB transceiver you can use VERA’s advanced features, scenes and scripting capabilities to control 433MHz-based devices, including LightwaveRF. Plus, you have one controller for all your home automation technologies.
This application note shows how to configure VERA Edge to work with the RFXtrx433E transceiver.
Installation and configuration of VERA Edge and the RFXtrx433E is straightforward:
- Connect the RFXtrx433E transceiver to the VERA controller via USB cable
- Upload device files to VERA that enable it to communicate with the RFXtrx433E
- Create a master device which VERA uses to control the RFXtrx433E
- Configure the serial (USB) port to enable VERA and RFXrtx433E to communicate
- Select the 433MHz protocols you wish to use
Upload device files to VERA
To enable RFXtrx433E to work with VERA you need to download a set of configuration files and upload them into your VERA.
- Download the configuration files as a ZIP file from: http://code.mios.com/trac/mios_rfxtrx/browser/trunk (this link is to the latest development version of the plugin).
- At the bottom of this page click Download in other formats – Zip Archive.
- Full information about these files, regular updates and tips and tricks are available in the VERA RFX Plugin Forum
- Once downloaded, extract the files from the ZIP file into their own folder on your computer.
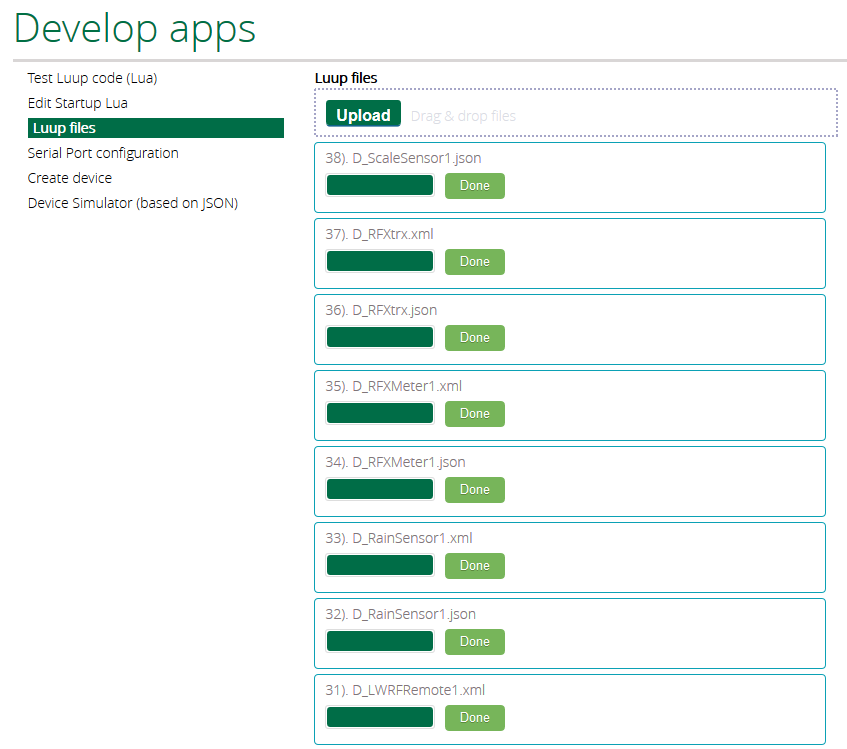
- In your browser open VERA UI7 Dashboard and navigate to Apps / Develop Apps / LUUP Files
- Select Restart LUUP after upload and then Drag & Drop all the files from your computer to Vera, next to the Upload button.
- Make sure your download the correct files
- At the time of writing this location had the correct file http://code.mios.com/trac/mios_rfxtrx/changeset/153/trunk?old_path=%2F&format=zip
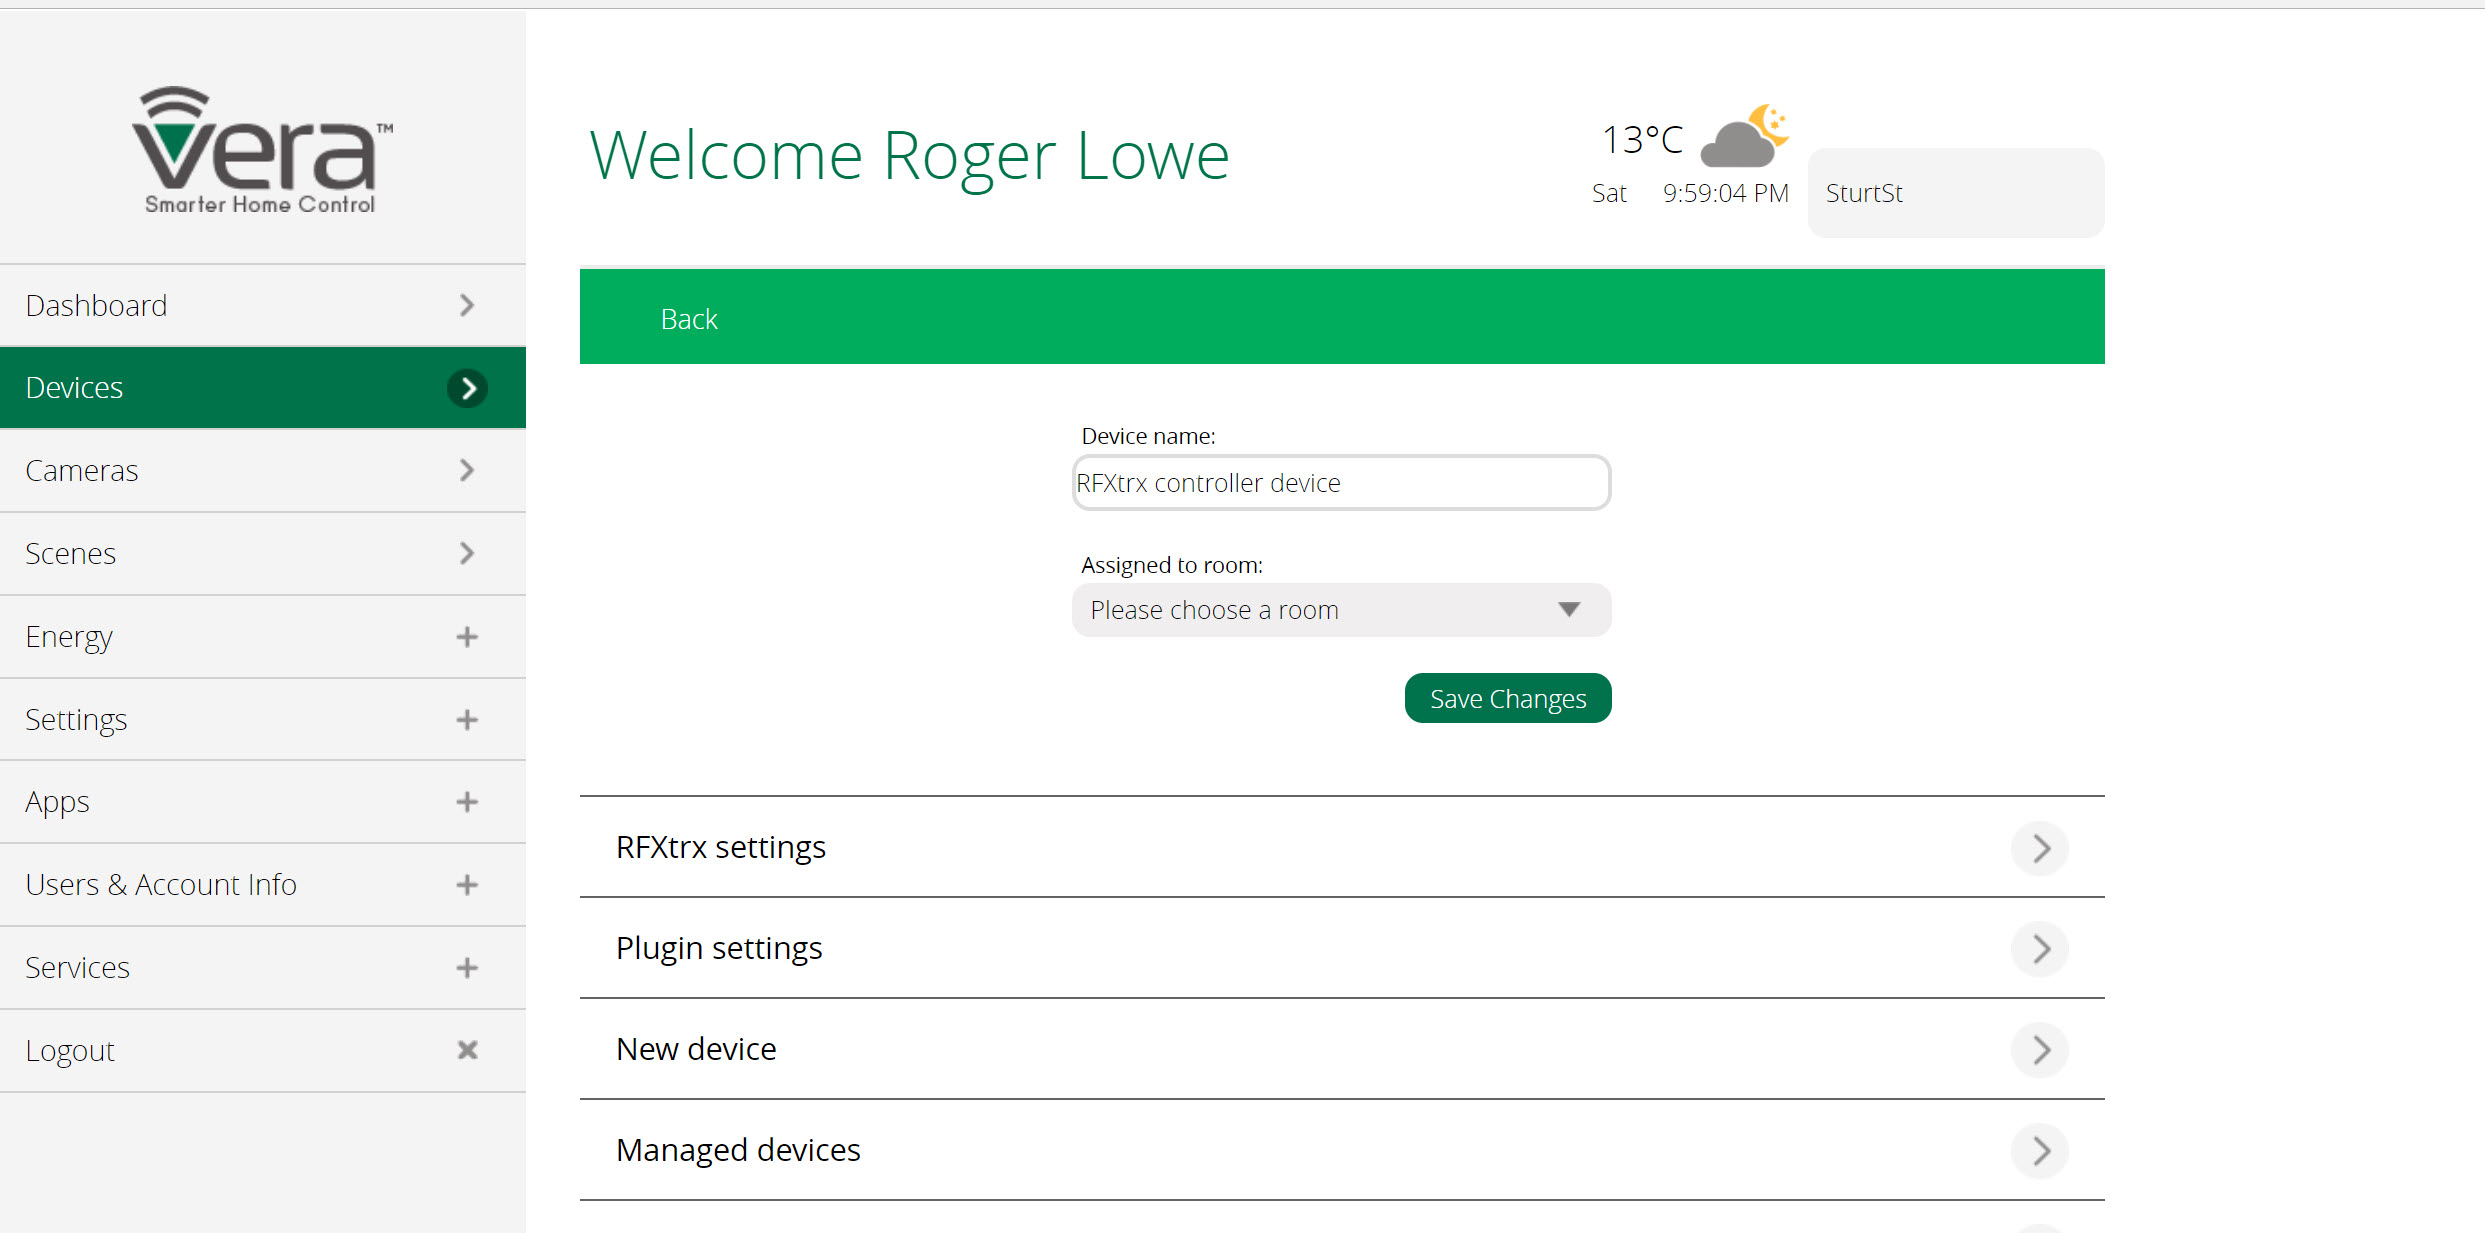
Create Master Device
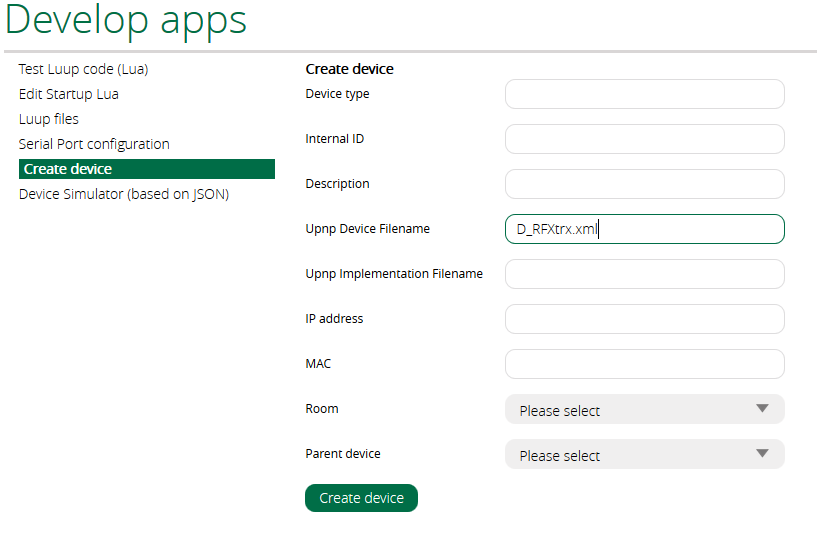
- Go to Apps / Develop App / Create Device
- Enter D_RFXtrx.xml in the Upnp Device Filename section
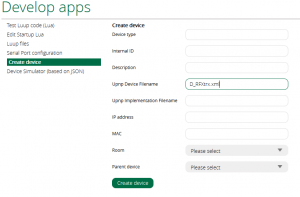
- Click Create Device and go back to the Dashboard
- Note: If the device doesn’t show up reload Luup engine by going to Apps / Develop App / Serial Port Configuration and click Reload Luup
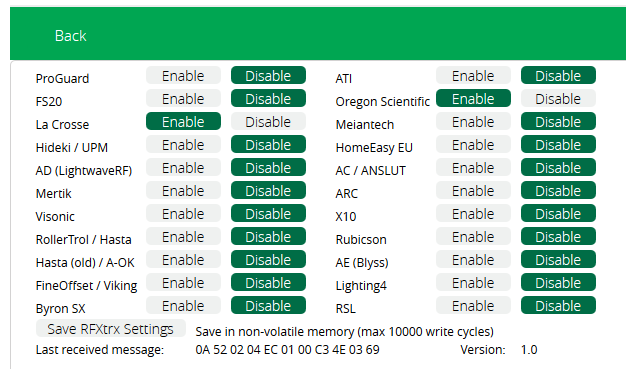
Select Protocols
The final step is to select the 433MHz protocols you wish to use. It’s worth noting that not all protocols work together, so you should only select the protocols that you wish to use.
- In the Dashboard go to Devices and select the RFXtrx controller device Setup by clicking its arrow icon

- Click RFXtrx Settings and select the protocols you wish to use
- Click Save RFXtrx Settings button
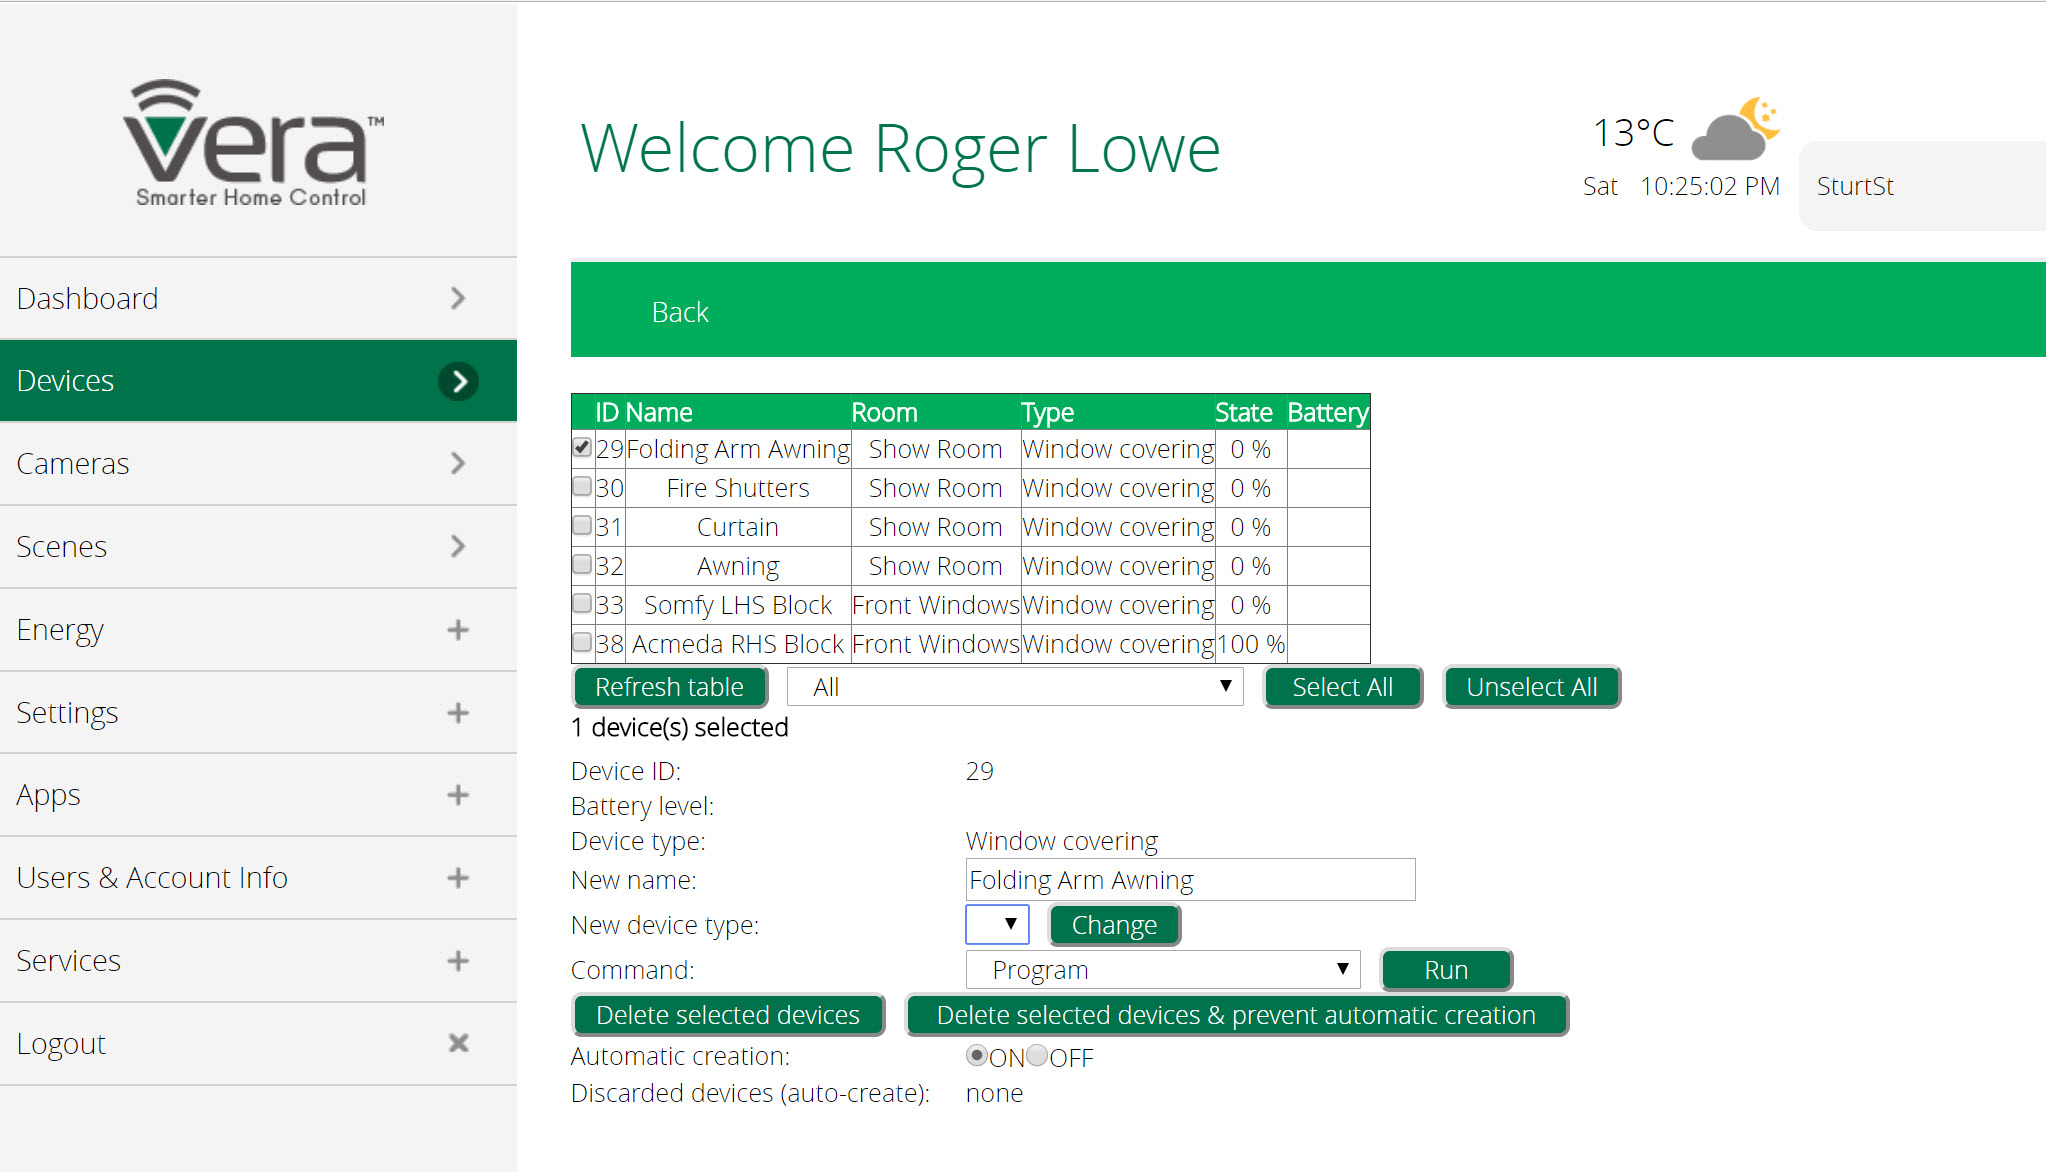
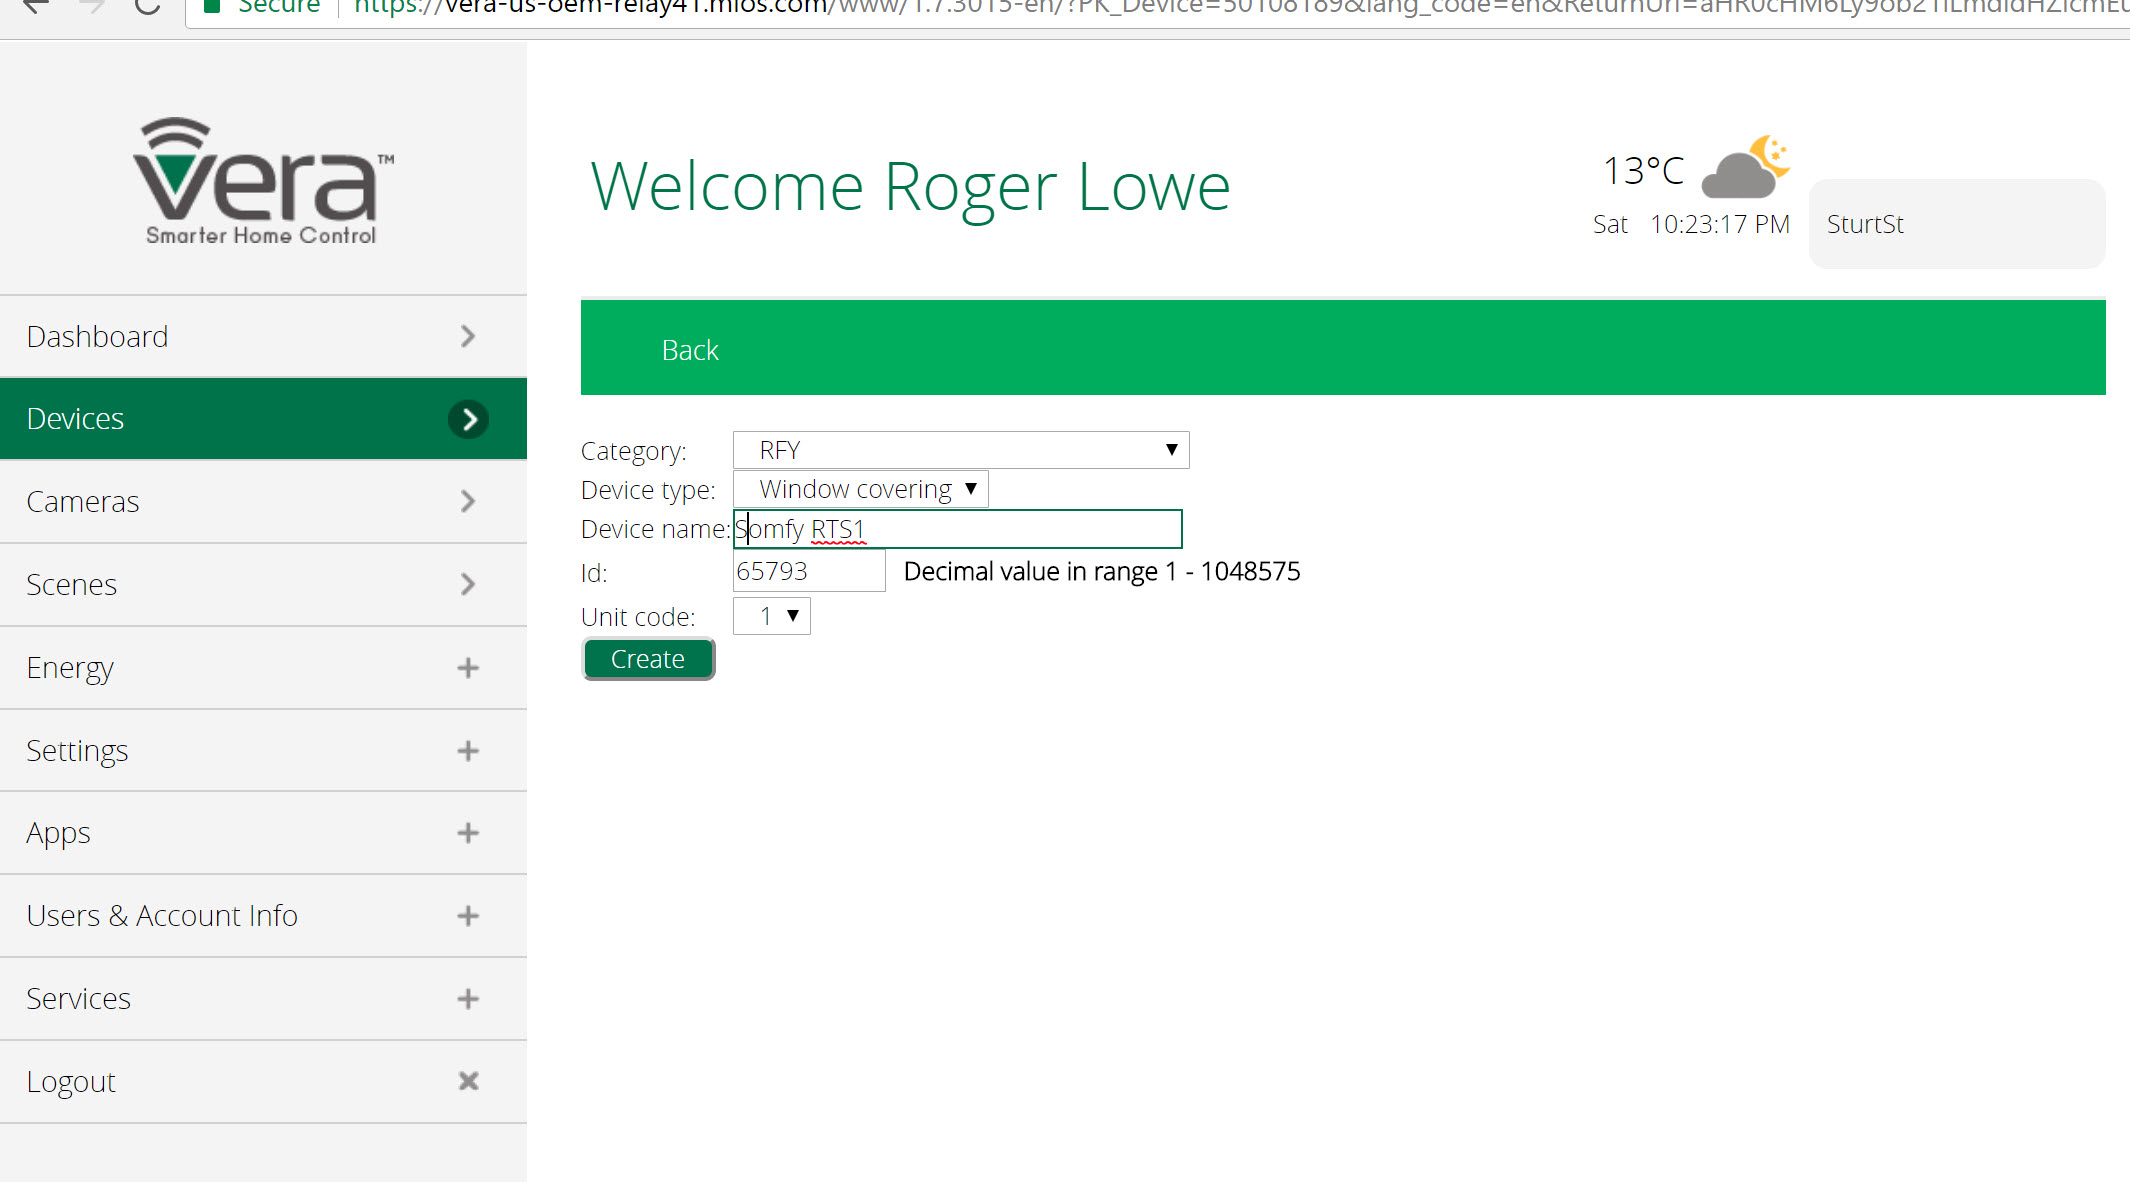
Add the Somfy RTS motors
If you have the correct Luup files you should see the following menu
Add a new Somfy RTS device
Pick RTL, and a unique number
Link Somfy RTS to RFXCOM
Final step is to link the Somft RTS to the Vera programmed slot Basically select the motor definition you want to link, push the program button on the Somft motors, it should jiggle, select the motor you have defined in Vera, and select program, then Run. The motor should jiggle.